Activity: Make Natural Fabric Dyes

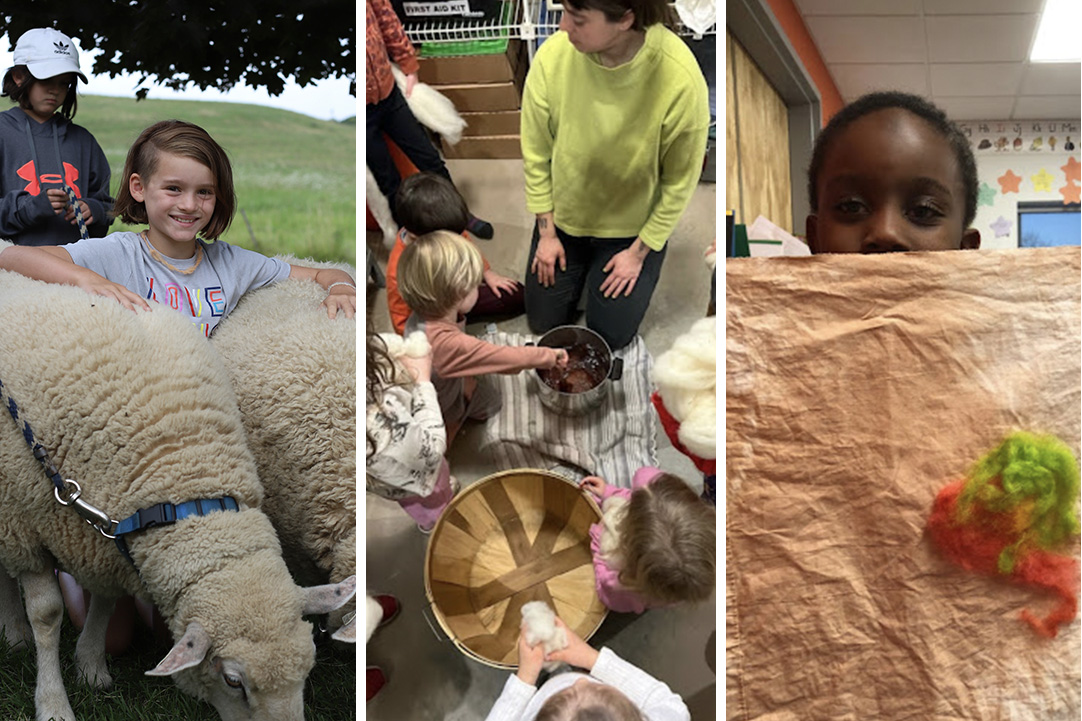
We talk a lot with children who visit the farm about where clothing comes from; we visit the sheep who provide us with fleece for wool sweaters and socks, for example. Farm educator Hannah Corbin has introduced another layer to this conversation: talking about the dye that colors our fabrics.
In programs with learners of all ages, Hannah uses food scraps—like onion skins—to transform textiles. “We talk a lot about ‘second lives.’ Something that seems like it should go in the trash or compost can actually be given a second life as material to dye fabric,” explains Hannah. “We also discuss fabric production over time, and how people still produce color in various cultures. Plus, making dye is a great way to get kids thinking creatively about working with natural materials.”
Even if you don’t explicitly talk about these connections with your young learners, seeing the transformation happen has an inherent “wow” factor. “Every time I’ve done natural dyeing with kids, it feels a little like playing with magic potions! Marigolds, which are red and orange, make a lime green dye. Avocado pits, which are greenish-brown, make a pink dye. Kids are always blown away.”
Here are Hannah’s tips for making your project a success.
- For natural dye, choose natural fabric. For a natural dye to really work, you want a natural fabric, “like cotton, wool, or even silk. This is another way you can get creative with giving things a second life. We recently used a white cotton sheet that was sitting in storage, unused, and cut it into bandana-sized pieces to dye.” You could even give new life to an unworn shirt in your closet, or a thrifted garment.
- Pick your dye material. We’ve experimented with all kinds of materials. Hannah recommends yellow onion skins (produces a yellow-orange dye); the water left over from soaking black beans (blue dye); cleaned avocado skins and pits (pink dye); or marigolds (green dye).
- Follow a 3:1 ratio of dye material to fabric. You’ll want to collect enough material for a 3:1 ratio of dye material to fabric by weight. If you’d like to be precise, you can use a kitchen scale to achieve this ratio, but we’ve had success estimating amounts, too.
- Add a mordant to help your color set. A mordant prepares your fabric to absorb the dye. We’ve experimented with a variety of mordants, including white and apple cider vinegar; citric acid; or alum powder. Follow a ratio of 10% mordant to fabric (for example, for 100 grams of fabric, use 1 tbsp. of mordant). You can use a kitchen scale to determine how much mordant to use—or, just eyeball it, which is what we’ve done! No mordant? No problem! You can easily do this project just for the fun of seeing what you create.
- Tie the dye to cooking. “I like cooking with kids first. I have them save the scraps from what they cook, and then mix up the dye as we talk and snack.” A few ideas: make tasty cheddar and black bean quesadillas with guacamole, and save the water in which you soaked your beans and the avocado pits for dyes. Use a lot of onions in your cooking? Save your onion skins over time to make a batch of dye. Hannah did this with our Junior Iron Chef team: they collected a bag of onion skins as they made dozens of batches of cheddar and onion pierogi to prepare for a cooking competition!
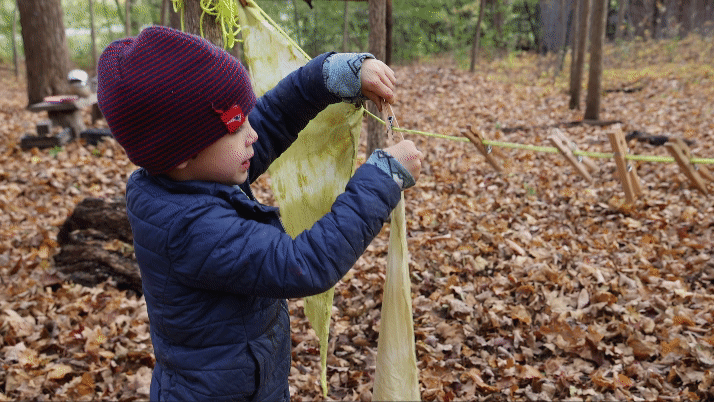
- Give yourself several blocks of time. This project involves three steps and some patience—prepping the fabric, making the dye, and dyeing your fabric. We like doing this project over the course of several afternoons. At home, you could even do this project over the course of a weekend.
Instructions
Adapted from Closet Core Patterns
We’ve used the following steps with all kinds of natural materials and plant parts. Dyeing fabric can be messy business, so consider using aprons to protect your clothing, placing towels nearby, and prepping an outdoor area to let your project air dry.
Materials
- Dye material of your choosing, see options and quantity notes above
- Natural fabric, like cotton, wool, linen, silk, or hemp, freshly laundered
- A mordant of your choosing, see options above
- A large pot, bucket, and strainer
- Tongs and a large spoon
Step 1: Prepare your fabric
- Fill a large bucket or pot with enough warm water to cover your fabric. If using mordant, add it to the water and mix well.
- Add your fabric and let soak for 1–2 hours.
- Remove your fabric from the mixture, gently squeeze out the excess mordant, and rinse. Note: You can reuse your mordant bath for another project.
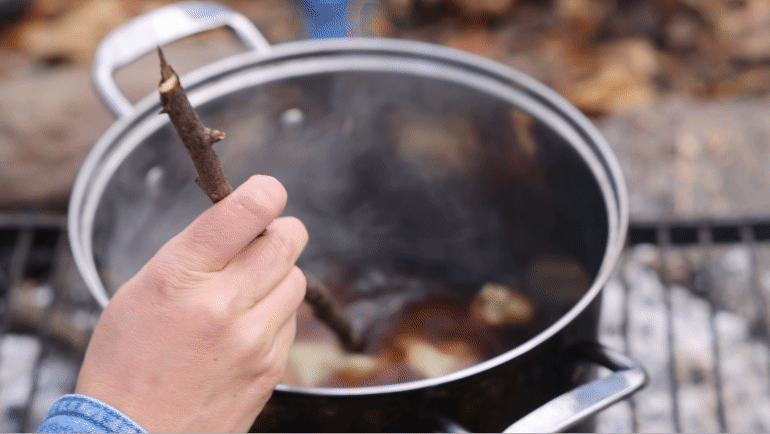
Step 2: Make your dye
- In a large pot, add your dye material and cover with water. Note: The amount of water you use will affect the brightness of your dye! More water will give you more dye, but the color will be diluted. Less water will give you less dye, but with a more vibrant color.
- Place the pot on your heat source and let the mixture simmer for at least an hour. If you’re using a tougher material like avocado pits, use a spoon to break material up as it softens to release more colors. Once it’s been removed from heat, you can even let your mixture steep overnight.
- Your dye bath is ready! To remove the natural materials, pour your dye through a fine mesh strainer.
Step 3: Dye your fabric
- Add your dye bath to a large bucket or pot. Make sure your dye bath is warm as it helps the fabric soak up the color. If necessary, bring your dye bath back to a simmer to reheat.
- Place your fabric in the dye bath, anywhere from 15 minutes to overnight depending on your preference and desired results. Experiment with tie-dye or other patterns by folding or bunching your fabric and tying with strings or rubber bands.
- Remove your creation with tongs, rinse under warm water, and let it air dry before placing it in the washing machine. Ta-da!