Activity: Make a Felted Owl

Late winter is shearing time for many of our sheep. Before the ewes give birth, their winter wool is trimmed away (read more about why). We recently celebrated the shearing season with a charming activity: making needle-felted owls from sheep’s wool!
There are many ways to felt; in needle felting, wool is worked with a barbed needle. The barbs agitate the wool fibers so that they lock or “felt” together. Says local fiber artist AnnMarie Anderson, “Think of felting as sculpting with wool. Instead of using your hands, you’re using a needle as your tool.”
Making a palm-sized owl is a great introduction to needle felting. AnnMarie, who led this activity with us, has the following tips for getting started.
- There are many types of wool, but most fibers are suitable for beginners. You can use any type of wool—wool roving, wool top, or wool batt—for needle felting as you start out. Coarser blends are great for most projects; finer wool lends itself to a smoother finished product. If you’re local, AnnMarie recommends Northeast Fiber Arts Center in Williston and Must Love Yarn in Shelburne. Online, check out Living Felt and Woolbuddy.
- Match your felting needle to your fiber. When gathering your supplies, note that coarser wool requires a thicker needle (36 gauge), and finer wool like merino requires a smaller needle (40 or 42 gauge). Felting needles are very sharp and fragile, so while working, hold and move your needle straight up and down. “Angling your needle puts too much pressure on its tip, which can cause the needle to break.”
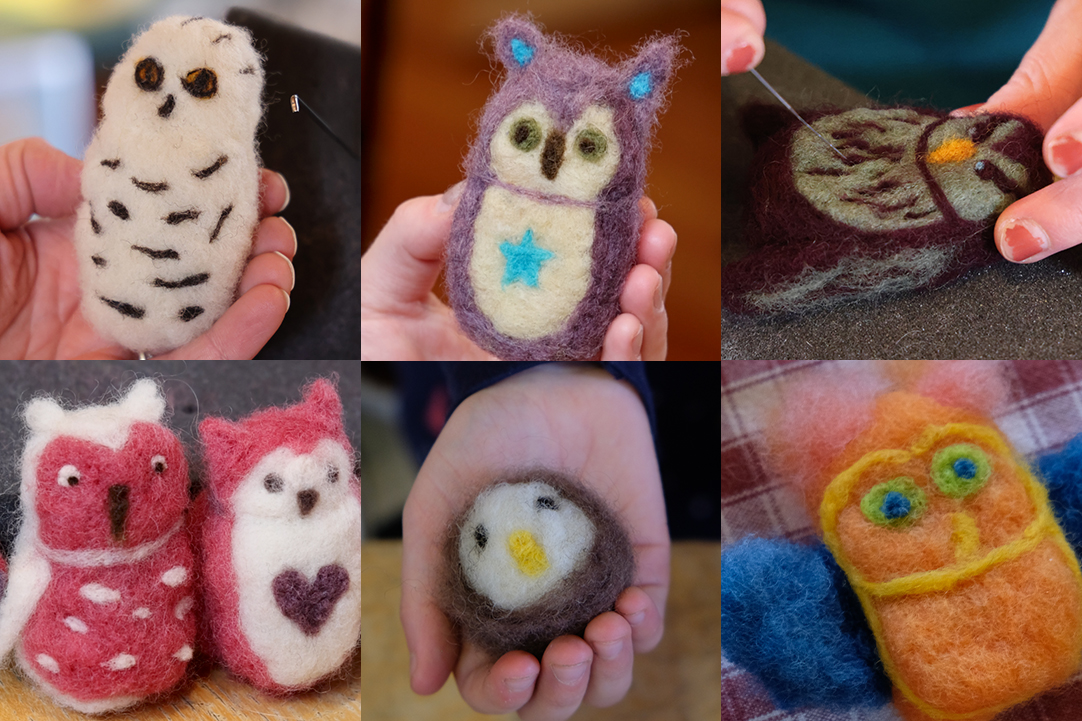
- Get creative with your interpretation. Do you prefer a realistic look, or a more whimsical winged friend? There’s no wrong answer in terms of shape, details, texture, or colors! Over the years, AnnMarie’s owl creations have ranged from cartoonish spheres to more realistic birds. If you’re creating a spherical owl, you can even felt around a small foam ball.
- Draw inspiration from a reference. Participants in our program got up close and personal with live models from Outreach for Earth Stewardship. Use these photos, or others of your favorite species, to inspire your creation.
-
 Andrea Estey
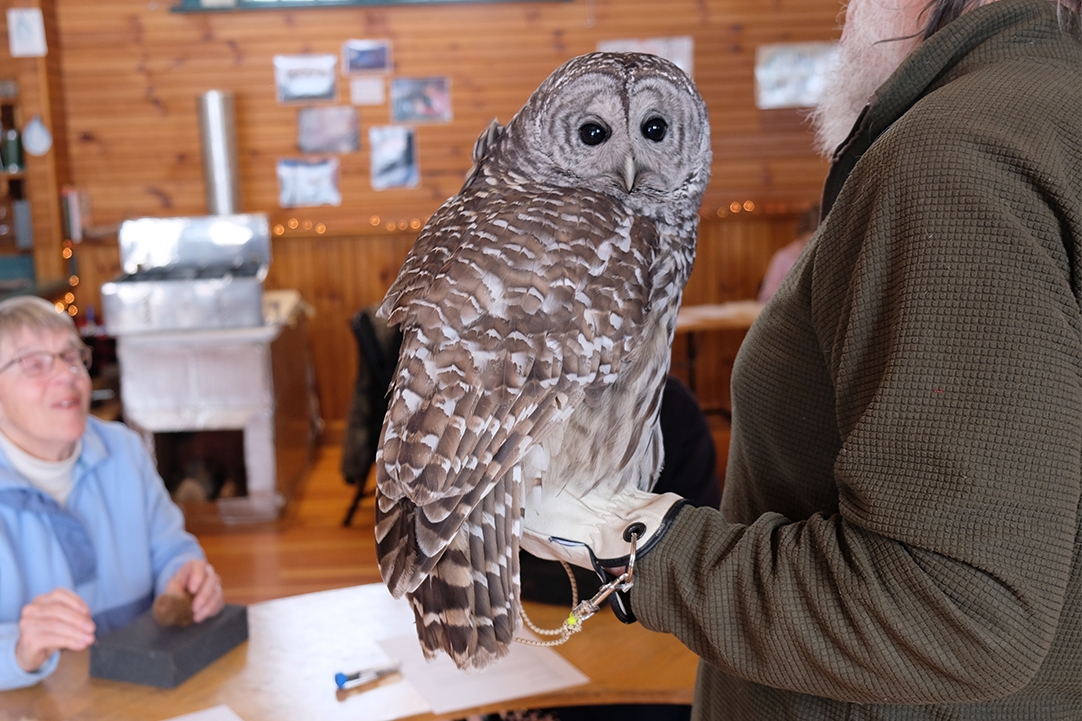
Take inspiration from Chapin and Ansel. Chapin, perched here on Outreach for Earth Stewardship director Craig Newman, is a barred owl, the most common owl species in Vermont. You can see a barred owl in Vermont’s woods this time of year; they’re often active during the day.
-
 Andrea Estey
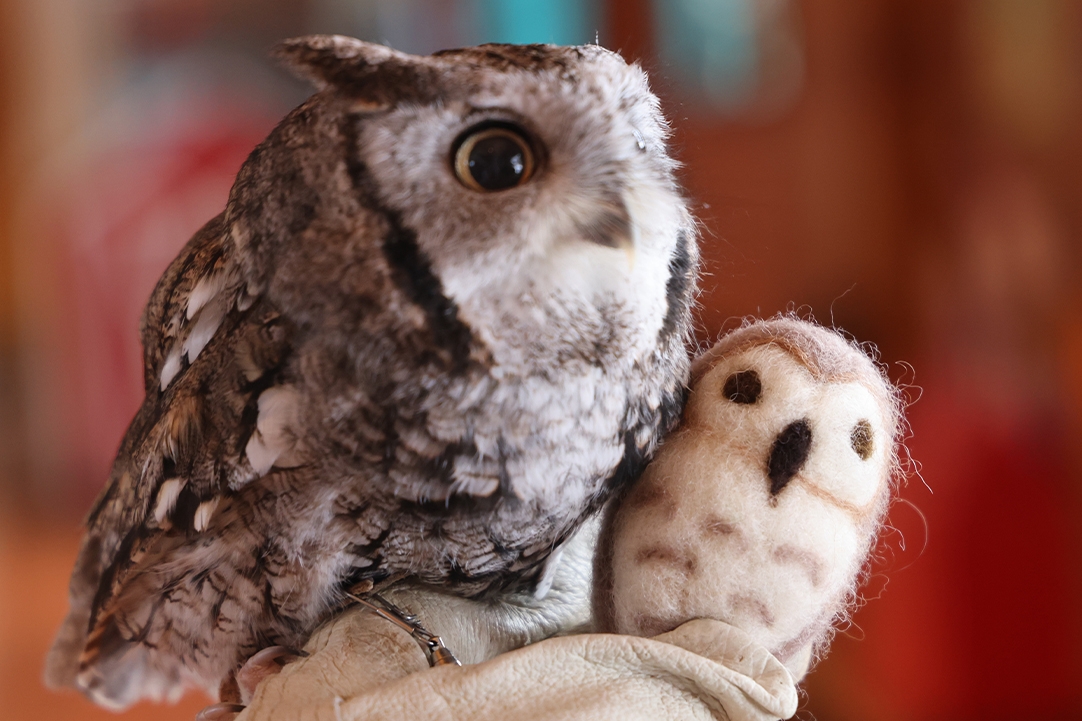
Ansel is a screech owl, weighing in at 235 grams—but that’s not Vermont’s smallest species! That title belongs to saw-whet owls, who are half of Ansel’s size.
-
 Andrea Estey
Ansel and a felted friend.
-
 Andrea Estey
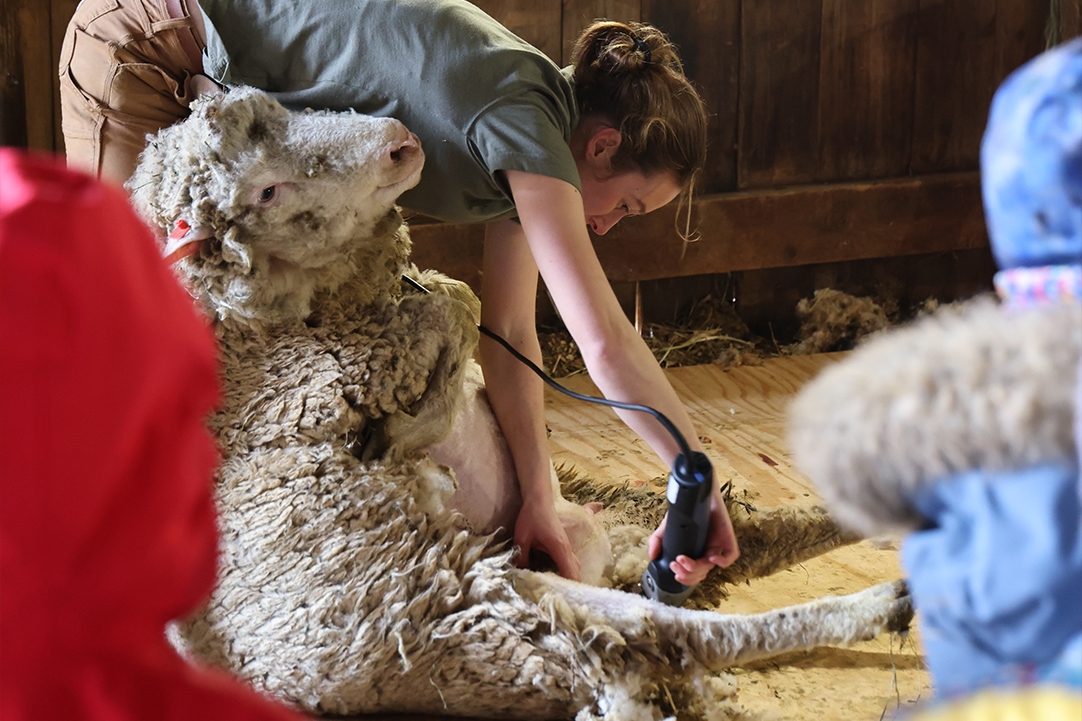
Herdsman Mo shears a sheep at the Dairy.


Activity: Make a Felted Owl
Materials
- A felting needle
- Wool in several colors
- A soft surface to felt on, like a piece of dense foam or a wool felting mat
Method
1. Select a small piece of wool for your owl’s body. Start with less than you think you’re going to need; you can always add material, but it’s harder to take wool away. Use your hands to mold the wool into the rough shape you’re after, smoothing wrinkles as you go, like you’re smoothing a piece of clay.
2. Place the wool on your felting surface. Holding the wool steady with one hand and your needle with the other, repeatedly poke the wool to create your desired shape. As you poke, pause to move and sculpt the fiber. Use caution as the needle is sharp. Felting requires patience; you can expect this step to take some time! Note that the more you work the wool with your needle, the firmer your bird will be.

3. If making a more realistic, oblong owl, define the head by poking an indentation all the way around with your needle, like a “neckline.”
4. Your base form is complete! Now, add features to your owl with other bits of colored wool. These details might include a beak and eyes; definition around the face or belly; head tufts; wings; feathers; and talons. Use tiny amounts of wool, a bit at a time. Attach details to your form by poking them onto the body with your needle.
5. If you’re building 3-D elements like wings, create them separately on your soft surface before attaching. To create fine lines and sharper details, roll pieces of wool between your hands, making a snake of fiber. To create a different-colored face or belly, stretch a small bit of wool into a thin mat, then attach. To turn the owl into a hanging ornament, thread a string through with a needle and tie.
6. Voilà! Enjoy your creation.


